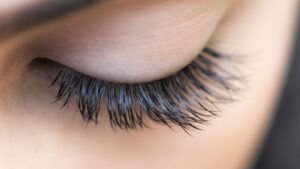
Applying false eyelashes looks effortless when someone else does it and impossible the first time you try. This guide walks through choosing, trimming, gluing and placing false eyelashes so they sit flush against your lash line, plus how to remove and reuse them without damaging your own lashes.
Easy Step by Step Procedure to Apply Eyelash Extensions
It’s no news that eyelash extensions can take your look from zero to one hundred at the snap of a fingers, or better still, the pinch of a pair of tweezers. But if only applying false lashes were that easy, yeah?
Well, you can stop worrying about how to apply those eyelash extensions you eyed for such a long time and finally summoned courage to buy. In this post, we share a super easy, step by step procedure for applying those lashes! Keep reading to find those easy steps, and a bonus too!
Here are some tips and tricks to keep your eyelash extensions in good shape for a long time.
How to apply eyelash extensions

It helps to put a hand mirror below your face while applying your lash extensions. This enables you to see what you are doing, and place the lashes correctly at the base of your lash line.
- Prep your lashes.
You do this after applying the eyeliner and eye-shadow that you desire. All you have to do is curl your eyelashes and apply mascara. Please note that this stage is optional, and you can also choose to do it at the end of the process.
Pro tip: Put a hand mirror below your face while applying your lash extensions, to help you see what you’re doing and do a neat job.
- Apply glue correctly to the eyelash
With the aid of a tweezer, hold up the false eyelash and apply a thin line of glue unto the lash strip or band. While dark glues blend better into your eyeliner, you don’t have to worry. Standard clear glue also dries nicely, so you don’t have to panic if you don’t have dark glue.
It is also advisable that you apply the glue on your lash with a cotton swab or Q-tip. This is because squeezing directly from the tube of glue unto the lash can result in glob of gluey mess that will ruin your lashes.
- Give the glue little time to dry
Gently wave the lash around after applying the glue to let it dry a bit. The glue does not have to get super dry and flaky. You just want it to dry a little so you don’t have excess glue running into your eyes or over your face. In addition, drying it a bit will prevent it from sliding around on your eyelids.
Avoid squeezing glue directly unto your false lash. Instead, use a cotton swab or Q-tip.
- Press the lashes into place
Now, using the tweezers, gently place the lashes on your natural lashes. Remember to do this with a mirror below your face to aid correct placement. Press the lashes gently to hold them firmly in place.
- Apply mascara

This will help to blend your natural lashes with the false lashes, and create a more natural look. It will also help to hide the eyelash strip. Depending on the color of your lashes, you can use black, grey or brown mascara.
- Apply eyeliner
Again, this helps to blend the lash extension with your natural lashes. However, it is also an optional step.
Voila! Your eyelash extensions are ready to rock!
Find tips and tricks to make your eyelash extensions last longer HERE
What you need before you start
Gathering everything first makes the difference between a calm five minutes and a frustrating twenty, because glue starts setting the moment it leaves the tube.
You will want your false eyelashes, lash adhesive, small scissors, tweezers or an applicator, and a mirror you can position at eye level rather than looking down into.
Have eyeliner within reach as well when applying false eyelashes. A thin line along the lash line disguises the band edge and makes false eyelashes look considerably more integrated.
Do your eye makeup first, everything except mascara. Applying shadow after the false eyelashes are on inevitably knocks them loose.
Choosing false eyelashes that suit your eyes
Most disappointing results come from picking the wrong style rather than poor application, so this decision matters more than the technique.
Natural or wispy. Fine fibres of varying length on a thin band. The most forgiving false eyelashes for beginners and the hardest to get obviously wrong.
Cat-eye. Longer toward the outer corner, which elongates round eyes and lifts downturned ones.
Doll-eye. Longest in the centre, opening and rounding the eye. These false eyelashes suit almond and downturned shapes particularly well.
Full volume. Dense and dramatic, best reserved for evenings and photographs rather than everyday wear.
Band thickness matters too. A thin, flexible band sits flush against the lid, whereas a thick rigid band on false eyelashes is the usual reason a corner lifts within the hour.
Trimming to fit, the step most people skip
Almost every pair is manufactured longer than the average eye, and wearing them untrimmed is the single most common mistake.
Hold the strip against your lash line before applying any glue. Line the inner edge up with where your own lashes begin, not with the inner corner of your eye.
Trim from the outer end rather than the inner one. False eyelashes are designed with the shortest fibres at the inner edge, and cutting there ruins the taper entirely.
Cut a little at a time and re-check. You can always remove more, and over-trimmed false eyelashes cannot be rescued.
Finally, bend the band gently into a horseshoe shape between your fingers for a few seconds. This flexes the strip so it follows the curve of your lid rather than fighting it.
Getting the glue right
Adhesive technique separates a set of false eyelashes that stay put all evening from ones that slide within minutes, and the mistake almost everyone makes is applying them too soon.
Apply a thin line along the band, slightly heavier at each end where the most stress occurs. A thick line squeezes out and shows.
Then wait. Give the glue thirty to forty seconds until it turns from white and wet to clear and tacky. Placing false eyelashes while the adhesive is still wet guarantees slipping.
Clear adhesive suits natural styles; black-toned glue doubles as eyeliner and suits dramatic false eyelashes. Latex-free formulas exist for anyone with a sensitivity.
Placing them accurately
With the glue tacky, placement is quick and there is a brief window to adjust before it sets fully.
Look down into a mirror positioned below eye level rather than straight ahead. This exposes the lash line properly and is why false eyelashes are easier to apply seated at a table than standing at a bathroom mirror.
Place the centre of the band first, as close to your natural lash line as possible without touching the waterline. Then press the inner corner down, then the outer.
Working centre-outward is what keeps false eyelashes even. Starting at one end almost always leaves the other end sitting too high or too low.
Hold each corner down for a few seconds. The outer corner is where lifting begins, so it deserves the most attention.
Blending so they look like your own
A well-placed strip can still look obvious if there is a visible gap between it and your natural lashes.
Draw a thin eyeliner line along the band once the glue has set. This conceals the edge and is the fastest way to make false eyelashes look integrated rather than applied.
Gently squeeze your natural lashes and the band together with your fingertips or a lash applicator, which merges the two rather than leaving them as separate layers.
A single coat of mascara on your natural lashes beforehand also helps them meet the band. Avoid mascara on the false eyelashes themselves, since it shortens their reusable life considerably.
Removing them without damage
Removal is where most natural lash damage happens, and it takes seconds to do properly.
Soften the adhesive first with a little oil-based remover or micellar water on a cotton pad, held against the lash line for around twenty seconds.
Then peel the band away slowly from the outer corner inward. Never pull false eyelashes straight off, because the adhesive takes your natural lashes with it.
If they resist, apply more remover rather than more force. Resistance means the glue has not softened yet.
Eye health is worth taking seriously here. The American Academy of Ophthalmology publishes guidance on lash safety and adhesive reactions worth reading.
Cleaning and reusing false eyelashes
A decent pair survives many wears if cleaned after each use, which is what makes false eyelashes cheaper than extensions over time.
Peel the dried glue off the band with tweezers straight after removal. Old adhesive is the reason a reused pair stops sitting flush against the lid.
Wipe the fibres gently with micellar water if there is makeup on them, then let the false eyelashes dry fully before storing.
Store them back in their original tray so they keep their curve. Loose in a makeup bag, they flatten and lose shape within days.
Common mistakes
Applying glue and placing immediately. The most frequent error. Waiting for tackiness fixes most application problems on its own.
Not trimming. An untrimmed band is why the outer corner lifts, and it affects almost every pair of false eyelashes straight from the packet.
Placing on the waterline. Uncomfortable and unsafe. The band belongs above your natural lash line, not against the eye itself.
Pulling them off dry. The single fastest way to lose your own lashes.
Frequently asked questions
How long can I wear them in one go?
A single day or evening. False eyelashes are designed to be removed nightly, and sleeping in them risks eye irritation as well as ruining the band.
Can I use them if I have sensitive eyes?
Usually, provided you choose a latex-free adhesive. Reactions are almost always to the glue rather than the fibres, so patch test a new adhesive on your wrist first.
How many times can one pair be reused?
It depends on quality and care. Well-cleaned false eyelashes can last many wears, while cheaper pairs lose their shape after a handful.
Should I choose these or extensions?
Occasional wear favours strips overwhelmingly. Our strip lashes versus extensions comparison works through the decision properly.
Building confidence with practice
Nobody applies false eyelashes well on the first attempt, and treating early tries as practice rather than performance takes the pressure off entirely.
Practise on a day when you are going nowhere. Applying false eyelashes for the first time an hour before an event is how people end up frustrated and late.
Start with a natural style rather than a dramatic one. Thin, flexible bands are considerably more forgiving of imperfect placement, and mistakes with subtle false eyelashes are far less visible.
Buy a multipack of inexpensive false eyelashes to learn on. Ruining a cheap set while working out your technique costs very little, and it removes the anxiety of practising on something expensive.
Expect the second eye to be easier than the first, every single time. Most people find their non-dominant hand is the real obstacle rather than the false eyelashes themselves.
Individual clusters as an alternative
If strip false eyelashes continue to defeat you, individual clusters are worth trying before giving up on the idea altogether.
Clusters are small groups of three or four fibres applied in sections rather than as one continuous band. They are more forgiving because a misplaced cluster affects a small area rather than the whole eye.
They also allow you to add density only where you need it, which strip false eyelashes cannot do. Many people place clusters at the outer third alone for a subtle lift.
The trade-off is time. Applying six or eight clusters per eye takes longer than one strip of false eyelashes, and removal is equally fiddly.
Never confuse cluster lashes with professional extensions. Clusters are removed nightly like any other false eyelashes, whereas extensions are bonded individually and last for weeks.
Matching the look to the occasion
The same pair of false eyelashes rarely suits every situation, and building a small collection serves you better than searching for one perfect set.
Daytime and work. Wispy, thin-band false eyelashes with varied fibre lengths. The goal is looking rested rather than made up, so anything dense will read as too much under office lighting.
Evening and dinner. A moderate cat-eye adds definition that holds up in dim light without tipping into costume. Most people find this the most useful pair to own.
Photographs and events. Cameras flatten everything you wear, so false eyelashes that look slightly heavy in the mirror often photograph perfectly. This is the one occasion where full volume earns its place.
Weddings and long days. Prioritise a flexible band and reliable adhesive over drama. Comfort matters far more than appearance across a twelve-hour day.
Keep glasses in mind too. If you wear them daily, choose false eyelashes short enough that the fibres do not brush against the lenses, which is both irritating and messy.
Caring for your natural lashes underneath
Regular wear of false eyelashes is perfectly safe provided the lashes underneath are looked after, and a few habits prevent the thinning some people report.
Take a break occasionally. Wearing false eyelashes every single day for months without a rest gives your own lashes no recovery time from repeated adhesive and removal.
Cleanse the lash line properly each night after removing your false eyelashes, since adhesive residue left along the base traps bacteria and can irritate the follicles over time.
An oil-free conditioning serum applied at night supports regrowth, and it costs very little relative to replacing false eyelashes constantly.
Avoid mechanical curlers on days you are wearing them. Clamping down on a band crimps it permanently and stresses your natural lashes at the same time.
Storing a growing collection
Once you own more than two pairs, how you store them starts affecting how long they last as much as how you clean them.
Keep each pair in its original tray rather than loose. The moulded curve is what preserves the shape of false eyelashes, and a set left flat in a drawer stops sitting against the lid properly.
Label the trays if the styles look similar. It is surprisingly easy to reach for the dramatic pair on a workday morning when every box looks alike.
Store them somewhere dry and away from direct sunlight. Heat degrades both the fibres and any adhesive residue left on the band.
Conclusion
Applying false eyelashes is a skill rather than a talent, and the learning curve is short. Almost every problem beginners have traces back to two things: not trimming the band, and not waiting for the glue to turn tacky.
Fix those two habits and the rest follows. Trim your false eyelashes to fit, wait for the adhesive, place from the centre outward, then blend with a thin line of liner.
Remove them gently with a softening remover rather than pulling, clean the band afterwards, and a single pair of false eyelashes will serve you for many occasions rather than one.